
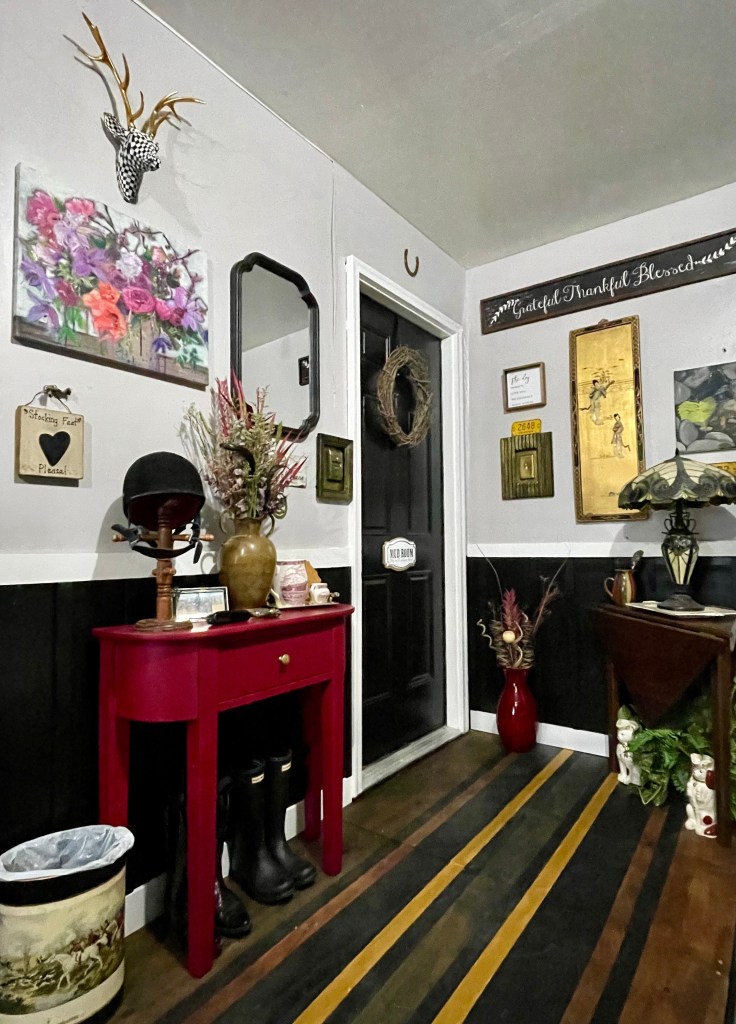
Ta-da! The grand unveiling: We now have a proper English-style boot room befitting an English Maximalista!
Part 3 of my Garage in Crisis mini-series was the hardest part to have been secretively holding back from you. I have been almost weeing myself with excitement to spill the beans!!
Long story short, my amazing husband built a dedicated entrance landing to my exact specifications — atta boy! — carving out this gorgeous, welcoming, informal entryway.
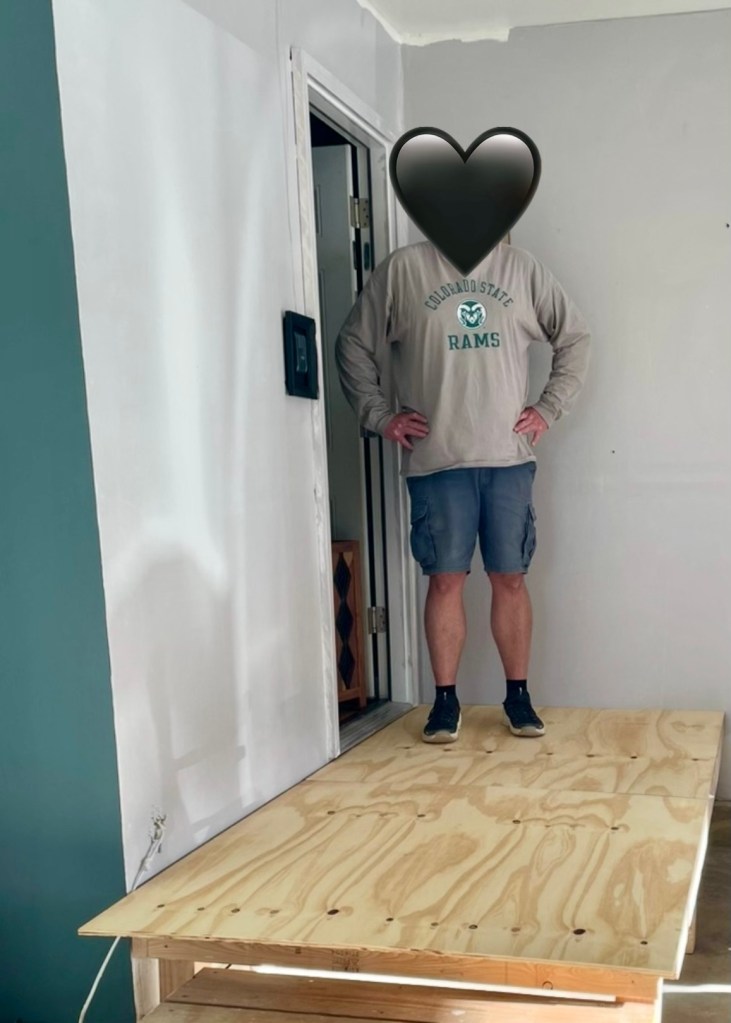
I painted and varnished the plywood to resemble floorboards,
and even hand-painted two gold-leaf stripes, just for fun!
Instead of the feeling of dread whenever I went into the garage, I am now super-duper excited to see it!
I am especially excited that Mr Maximalista was able to create some additional, much-needed storage underneath the platform, as well: we now have an easily-accessible cubby for our Christmas bins, freeing up some space in the rafters in which to place our Christmas trees.
The new landing is what I consider to be our piece de resistance in the garage. I am thoroughly thrilled with the results!
No more tripping over random items, every time we go in or out of the house! This is a big win — hurrah!
*****
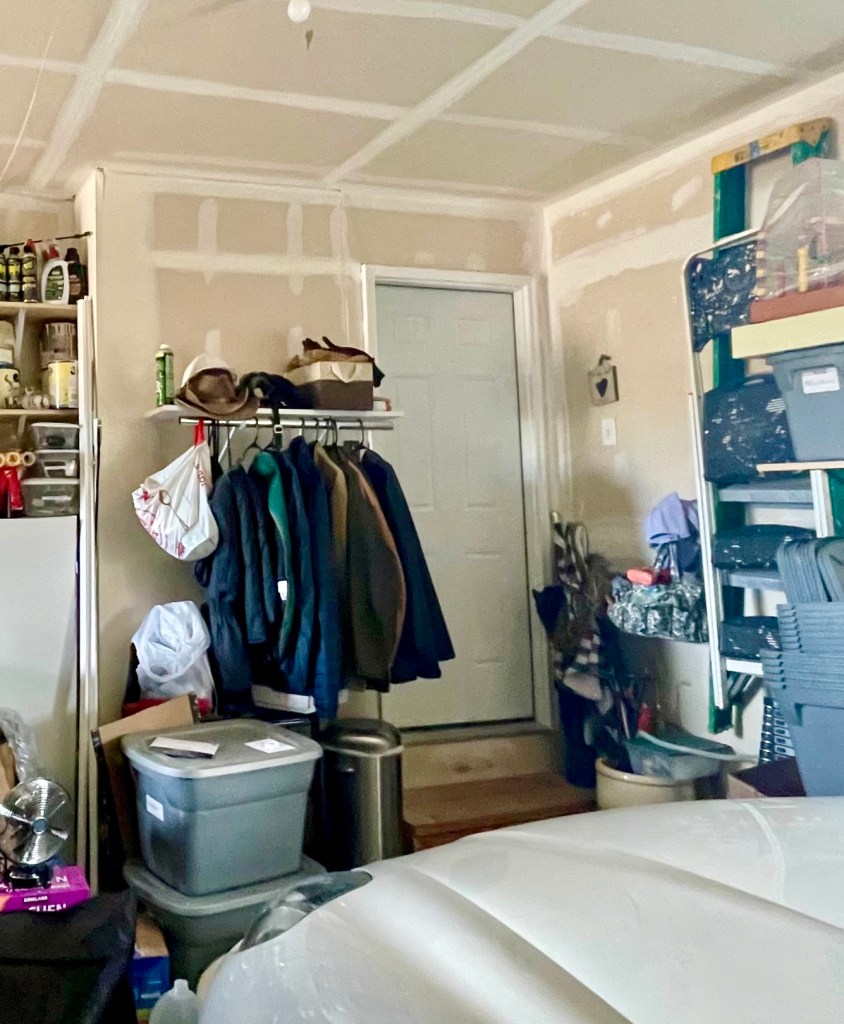
If you have been following my recent blogs, and posts on social media, you will have seen the genuine transformation between the BEFORE garage and the AFTER garage. Such that my own mother, who is a regular visitor to the love shack, did not recognize it when I sent her some pictures. Safe to say she was flabbergasted.
(The fact that Mummy Dearest was speechless is not a small feat. This woman seldom loses her power of speech. In fact, I can count the times on one hand that I have ever seen this phenomenon in all of my fifty years.)
Stretching out the Garage in Crisis blogs over three parts was crucial to me, because it truly has taken me an entire two weeks of effort and hard work to get this space reorganized and redecorated. However, all the blood, sweat, and tears were worth it, as we absolutely love the result… although I did wonder at first whether I had bitten off more than I could chew!
There was an awful lot of shunting things from point A to point B. Hefting bins and things up and down ladders. Sorting through everything. Reorganizing. Taking several car-loads of donations to charity.
My objective, going into this project, was to spend as little money as possible; as you will see in the budget break-down below, we spent money only on (mostly!) necessities.
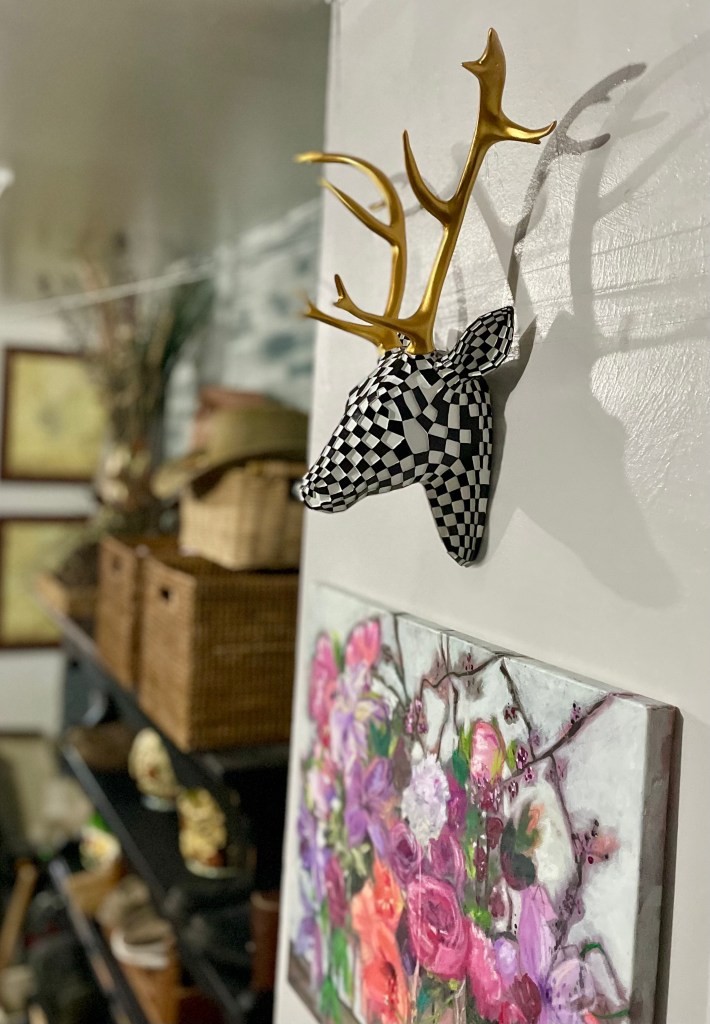
And yes, I do believe these mosaic antlers should be considered a necessity…
*****
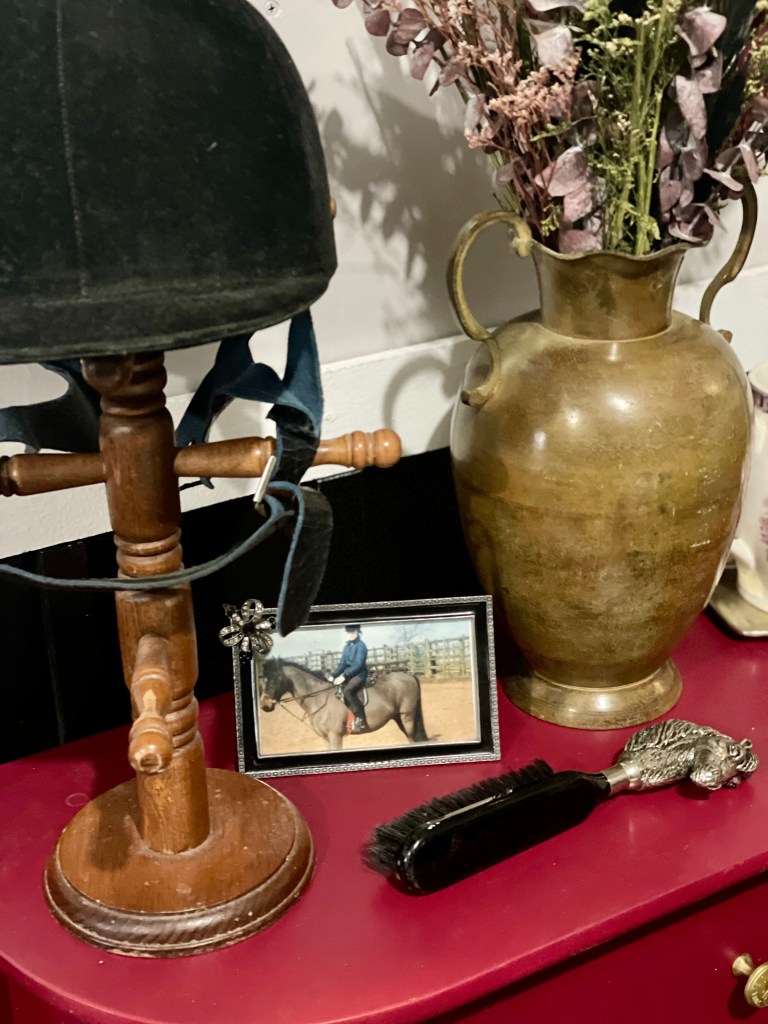
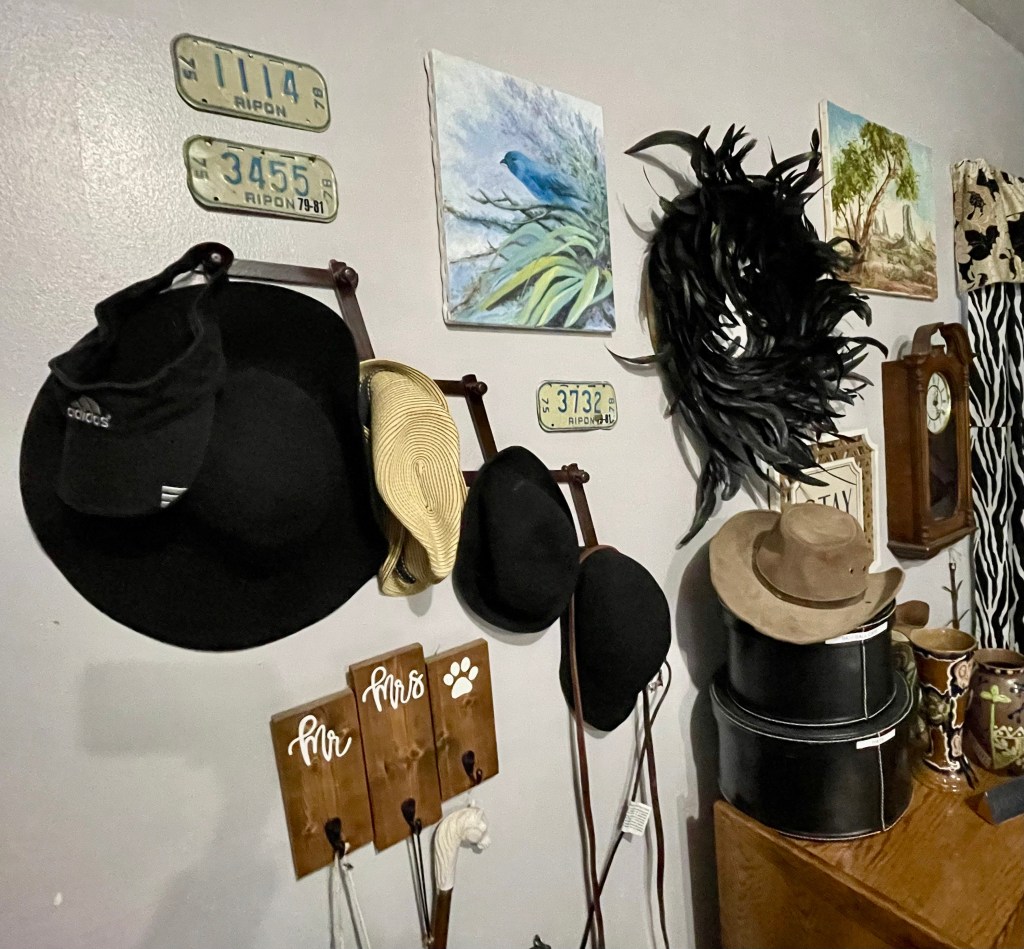
Thanks to my dear old friend Mr Pinterest, I was able to find the inspiration to elaborate on my vague idea to create a kind of rustic-yet-modern entry into our home. I knew I wanted it to be filled with personal items (Mr M’s motorcycle plates from his teens, my old riding hat, our coats and shoes, etc), along with paintings and decor to give the space some English tack-room vibes.
You know how much I love to go shopping, so you can imagine how tempting it was to go gangbusters with the English country house aesthetic. But honestly, I really did not need to go out and buy any more decor when we already have so much.
Besides, I actually had a lot of fun brainstorming in the evenings, deciding which items to poach from other parts of the house, visualizing how to pull off the look I was aiming for.
Practical. Useful. Charming. I think I nailed it!
As usual, I went shopping around the house and found:
- Various paintings, vases, and planters poached from elsewhere
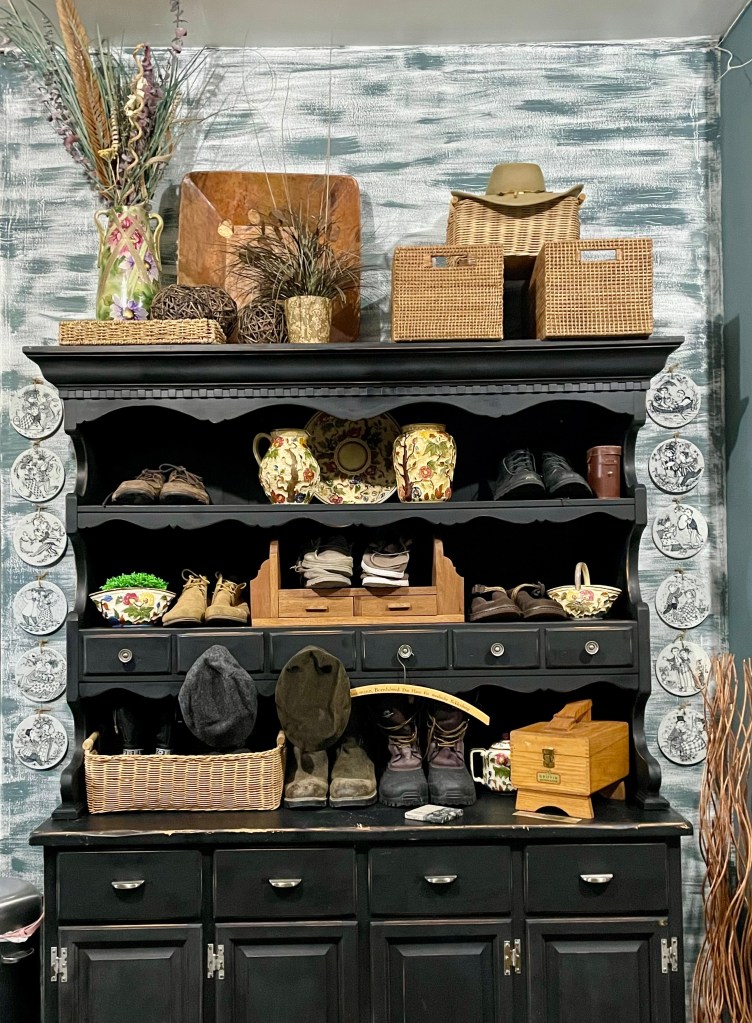
- A box of 12 black and white Björn Wiinblad trivets, which haven’t seen the light of day since they hung in the breakfast room at my old Victorian farmhouse
- Several license plates from teenage Mr M’s bikes
- 2 window valances, and the curtain rods that went with them
- Leftover fabric from previous projects (for curtains on glass doors)
- Rugs that were rolled up in the rafters
- A metal antique corn holder, that used to hang in the mudroom at the farmhouse
- The plastic bag dispenser that my English grandmother made for me 25 years ago, which was in the laundry room but is now in a more sensible spot
Before I could start the nesting part of the process, I had to do a lot of cleaning, and a LOT of painting.
- The lavender-grey paint I had originally purchased for my bathroom got used up for the landing and on my side of the garage
- I also used up all the white paint I had “in stock” to paint the ceiling, although I didn’t get very far until I ran out — classic Maximalista situation! In the end, we used up about four gallons of semi-gloss white paint for the ceiling, and the walls on Mr M’s side of the garage
- For the small section of wall behind my old china cabinet, I created a feature wall by swooshing on some green paint that I had, adding a pop of colour for a bit of visual interest
- Mr M cut the chair rail, battens, and baseboard using wood we already had; I then painted it all using black semi-gloss that we had in stock
- After he built the landing into the house, I taped up some stripes on the plywood, and used varnish (that we already had in stock) to create the look of faux floorboards; it’s different colours because I was finishing up dribbles that we had left, but I kind of like the result. I’m not in a hurry to replace it with tiles, which was our original plan
Other little projects I have completed to beautify the garage:
- Put curtains up on the windows (we had the valances, which used to hang in our kitchen before I redecorated in there)
- Reused curtain rods we had knocking about from the last house
- Made a feature out of the boring old garage door opener, inspired by Monica’s door in Friends
- We moved stuff around in Mr Maximalista’s workshop, which freed up my old china cabinet again; I really LOVE how that turned out, which you can read about in more detail in my previous blog.
English Majolica, and other outdoorsy miscellany
*****
To bring you up to speed, we spent the following on upgrades to the garage:
- 3 gallons of white ceiling paint (Walmart, $23.99 per gallon)
- Black-framed mirror ($9.99, Ross)
- 4 full-length curtain panels ($7.99 each, Arc thrift store)
- Cute Mr & Mrs hook ($3.99, New Horizons thrift store)
- Maple gun cabinet, which I repurposed as garden tool storage ($26.49, ibid)
- Grateful Thankful Blessed signage ($9.99, Hobby Lobby)
- Mud room sign ($8.99, Hobby Lobby)
- Mosaic antlers ($22.88 after applying points and coupon, Amazon)
- Lumber (175.96, Home Depot)
- Pre-built railing (62.99, Ibid)
- 2 cans of spray paint for railing ($6.69 per can, Walmart)
- This brings us to a grand total of $438.59
I think that is a small price to pay, don’t you? Sure, I would have loved to spend ten grand on wooden built-ins, brand new flooring throughout, as well as some beautiful wallpaper, but that simply is not feasible. Besides, I am thrilled with the results we got, all for less than $500.00!
It also felt great to get my creative juices flowing.
And now? Well, I think Mr Maximalista and I have deserved some well-earned R&R for a few days. I slept for 12-hours straight, last night — my body was calling for it! I’m looking forward to a nice, quiet weekend at home with my hubby, feet up with a book or two, snuggling on the couch with our dawg! Heaven.
Although I may be popping my nose in the garage quite a bit to admire how pretty it now looks.
Lots of love,
M xo


Leave a Reply